by CDO Technolgy | Jun 25, 2017 | CDO Technology News, Gaming System, Pro Workstations
When determining which kind of graphics card would be ideal for a particular computer system, one must consider for what purpose the system is to be used. There are two primary classifications of graphics cards: professional and consumer. The professional cards are optimized for productivity applications, while the consumer cards are optimized for recreation and entertainment purposes. Two of the most commonly sought after professional graphics cards are the NVIDIA Quadro and the AMD FirePro. Quadros come in several varieties, with a range that encompasses an astonishing array of different types. Each type has its own combination of possible factors, including speed, memory, power usage, and connector. AMD’s FirePro also represents a fairly large range of possibilities and options to enhance compatibility, however this company tends to have a rather small share of the overall graphics card market. Still, the FirePro is a powerful graphics card made to run efficiently with a reasonable power draw.
The main pros for professional graphics cards include excellent performance, especially for CAD programs and similar productivity software, products for mobile devices, continuing innovation, and specialized technology. Professional graphic cards also have stricter quality control and use better parts in manufacturing and are designed to run 24/7 at peak workload. Their software (drivers) have been tested/certified to work with professional applications while consumer grade has not.
Cons include a higher price, the need to examine the specifications carefully to be sure the correct one has been chosen for the machine into which it is to be installed, and the fact that some need additional cables or adapters that may or may not be included in the package.
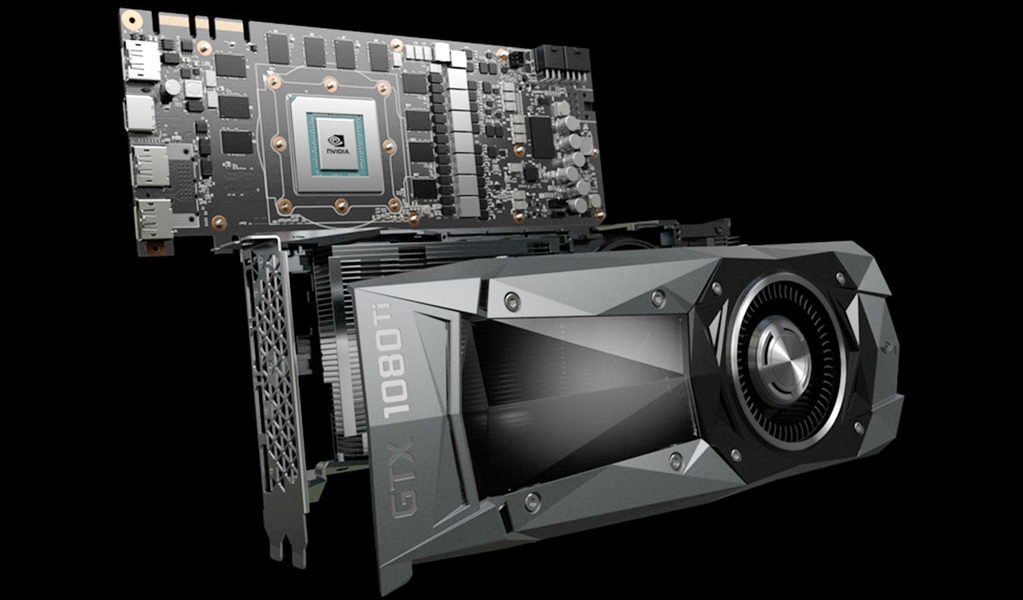
Common consumer graphics cards include the NVIDIA GeForce and the AMD Radeon. NVIDIA’s GeForce has at least 13 series, each a bit better than the last. They also have options for mobile devices and smaller machines. These graphics cards are well known among gamers as an excellent option. The newest series, GTX, takes gaming to a new level with Maxwell architecture for acceleration, offering fast performance and the latest technology for gaming. AMD’s Radeon is geared for speed, immersion, and graphics that dazzle the eyes. Their processors are optimized for efficiency of power while delivering a visual experience that more than satisfies.
These consumer graphics cards’ upsides include the fact that they are specifically geared to gaming, allowing quick drawing for higher frame rates. They contribute to lower latency and better visuals. The downsides of these cards include the fact that, generally, they use quite a bit of power. They tend to heat up quickly and, without proper ventilation, can overheat. They are one of the largest components you may add to your computer, when upgrading.
When choosing a graphics card for a system, lean strongly toward a professional graphics card if the machine is to be used for CAD or other design-oriented software. Choose a consumer graphics card if the machine is intended for gaming.
by CDO Technolgy | Feb 17, 2017 | CDO Technology News, Pro Workstations
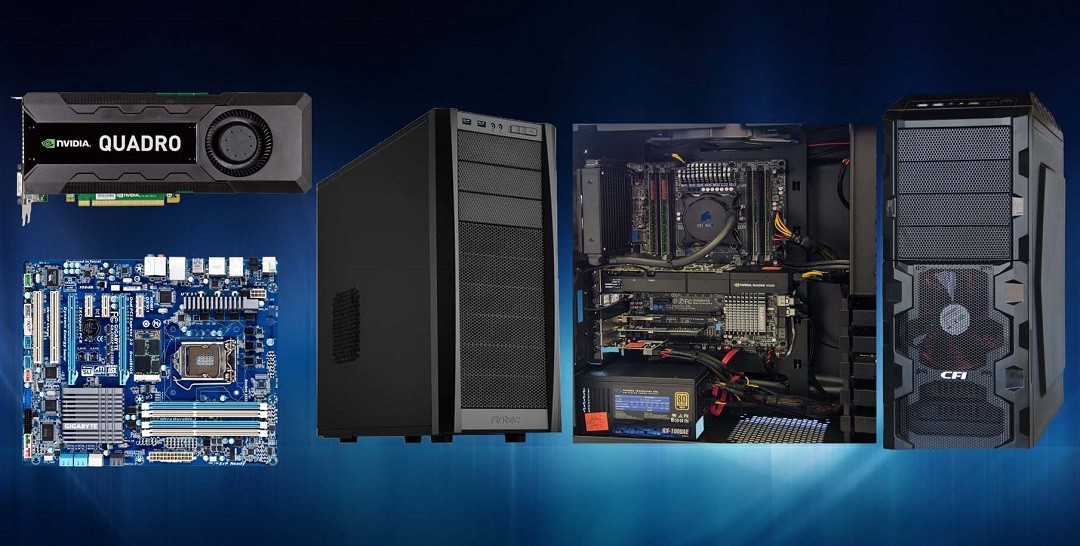
Creating the perfect Performance Workstation that will do what you need it to do can be very difficult. To do this, you have to understand how the different hardware parts affect workstation performance for your specific work tasks. The key hardware choices you have to make are the CPU, graphics processing unit (GPU), RAM, and hard drive.
PROCESSOR
The processor choice is simply a decision between CPU frequency (speed) and number of cores. Typical performance workstations range from four to 36 CPU cores and up to 72 CPU threads. Generally, there are twice as many threads as cores and threads are ordered sequences of instructions that specify what the CPU should do. Speed is measured in GHz and typically fewer core count processors run at a faster frequency while higher core processors typically run at lower frequencies.
The creating and manipulating 3D object portion of applications like SolidWorks, 3ds Max, and Maya need higher frequency CPUs more than increased core count, whereas rendering and simulation applications want more cores for peak performance. Safely over clocked Intel processors can provide up to 25% more performance for modeling and design applications than the standard processors. Intel Xeon processor(s) have up to 36 cores and 72 threads and these processors are fantastic for rendering and simulations.
GPU
The GPU is responsible for creating the image you see on your LCD. The GPUs are responsible for setting up polygons and applying lighting, texture and color to a 3D image. Nvidia and AMD produce the professional grade graphics cards for these applications. They are designed to run 24/7 at peak workload without failure through their strict quality control and use of better manufacturing parts. They also have tested and certified intermediary software (drivers) that tell the graphics card to how to run flawlessly with the operating system and the application software that professionals use for the work.
Design & Modeling
The interactive portions of applications like SolidWorks, Revit, Maya, and 3ds Max don’t gain advantage from multiple GPUs and run fine with basic to mid-range NVIDIA Quadro or AMD FirePro graphics cards. The GPU holds frame rates up for smooth panning, zooming and rotating when creating and working 3D objects.
Simulation & Rendering
GPU rendering engines like V-Ray RT, Octane, and Iray and simulation applications like CATIA and ANSYS can use the GPU to work in the background rendering and simulating – working exponentially faster than the CPU in these applications. Buying higher-end GPUs and in many cases running multiple GPUs will increase performance and be well worth the money.
Large & High Resolution Display Screens
High resolution displays require high GPU memory that is only available on top end cards. Especially when running many monitor resolutions and 4K displays, multi-graphics cards are a good idea. Adding a second graphics card doesn’t double performance; typically you will see a 25-50% increase.
RAM
It is much better to have more memory than not enough but it is hard to tell how much is enough. More RAM allows you to multitask without getting bogged down. It is recommend to have at least 16GB of RAM to start with and much more for such jobs as: simulating large data sets, textures in 3D graphics, complex video editing, large scenes with lots of polygons, and complex part product design. A rule of thumb is having a 25% buffer of RAM usage while doing very intensive jobs.
HARD DRIVES
Properly configuring the OS and data drives in each workstation and then using SSDs to increase data reading times and decrease seek times is very important. Sustained read time can be more than four to five times higher on an SSD. Seek times are also much faster; consequently the faster SSDs are rated nanoseconds instead of milliseconds like SATA drives. This increased speed can have noticeable impact on your daily project completion times. A 250GB SSD is recommended for the operating system and program installation and a SATA drive for storing data and work.
by CDO Technolgy | Feb 2, 2016 | CDO Technology News, Gaming System, Virtual Reality
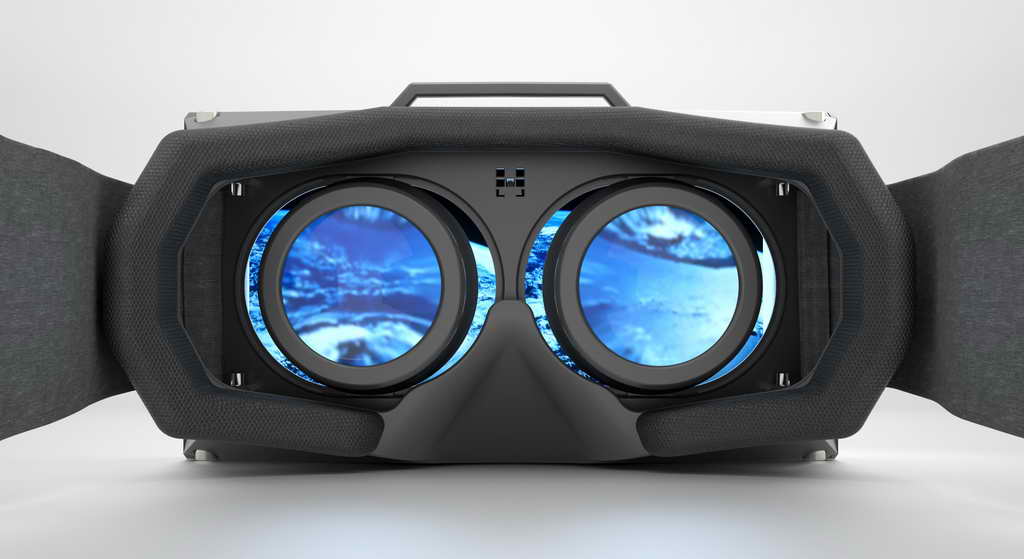
For gamers and tech-addicts, 2016 is shaping up to be a storm of incredible leaps forward in virtual reality technology. Although many consoles are taunting potential virtual reality players with cheap models, those who want the full experience know that a spec’d-out PC is a must for the full experience.
Building a VR-ready PC for the Oculus Rift might seem intimidating and expensive at first, but with our guide, you can get in on the fun with any budget:
Important Components:
GPU: Your graphics-processing unit will make or break your VR experience. To sustain the 90FPS world of VR gaming, you need a GPU that won’t slow down at crucial times. Rift developers recommend running either the NVIDIA GTX 970 or AMD R9 390 when using the Oculus Rift.
RAM: Normally, you want a minimum of 8GB onboard ram for optimal game performance. This spec holds true when building a VR-ready console, but investing in an upgrade to 16GBs of onboard ram will guarantee your machine runs smoothly.
CPU: The slowest processor that can get the job done is the Intel i5-4590, or another power-equivalent CPU. Overall, your build can get away with running on a lower-end CPU, as long as you account for potential bottlenecking. Only consumers looking to build a high-end VR machine will warrant investing in an expensive CPU.
Motherboard: Although the motherboard doesn’t directly affect your VR experience, it provides the backbone for the rest of your hardware. Be sure to check the compatibility of any motherboard you are considering with the additional components of your build. Finding a motherboard that supports USB 3.0 is highly recommended.
PSU: When choosing your power supply unit, it’s best to plan ahead. VR setups run power usage-heavy peripherals, and you want to ensure the high-end graphic cards you upgrade to in the future will run properly. Having a PSU powerful enough to prevent immersion-breaking fan-noise is a must.
Storage: Running either a SSD or HDD will work when building a VR-ready PC. However, an investment in an SSD will speed up game performance, keeping you fully immersed in your VR worlds.
Recommended Specs:
Official Oculus Minimum Specs:
- CPU: Intel Core i5-6500 equivalent or greater
- GPU: NVIDIA GTX 970 / AMD 290 equivalent or greater
- RAM: 8GB+ RAM
- 2x USB 3.0 ports
- Windows 7 SP1 or newer
- Compatible HDMI 1.3 video output
Solid Specs:
- CPU:Intel Core i5-6500
- GPU:GeForce GTX 980 or Radeon R9 390X
- Storage 1:128 GB SSD
- Storage 2:1TB HDD
- RAM:8GB DDR4
Mid-Range:
- CPU:Intel Core i5-6600K
- GPU:GTX 980 Ti
- Storage 1:250GB SSD
- Storage 2:2TB SATA HDD
- RAM:16GB DDR4
High-End:
- CPU:Intel Core i7-6700K
- GPU:GTX 980 Ti (alternative: 2x GTX 980 Ti)
- Storage 1:512GB Samsung 950 Pro PCIe M.2 SSD
- Storage 2:4TB HDD
- RAM:16GB DDR4

by CDO Technolgy | Oct 24, 2014 | CDO Technology News, Input Devices
What is a KVM Switch?
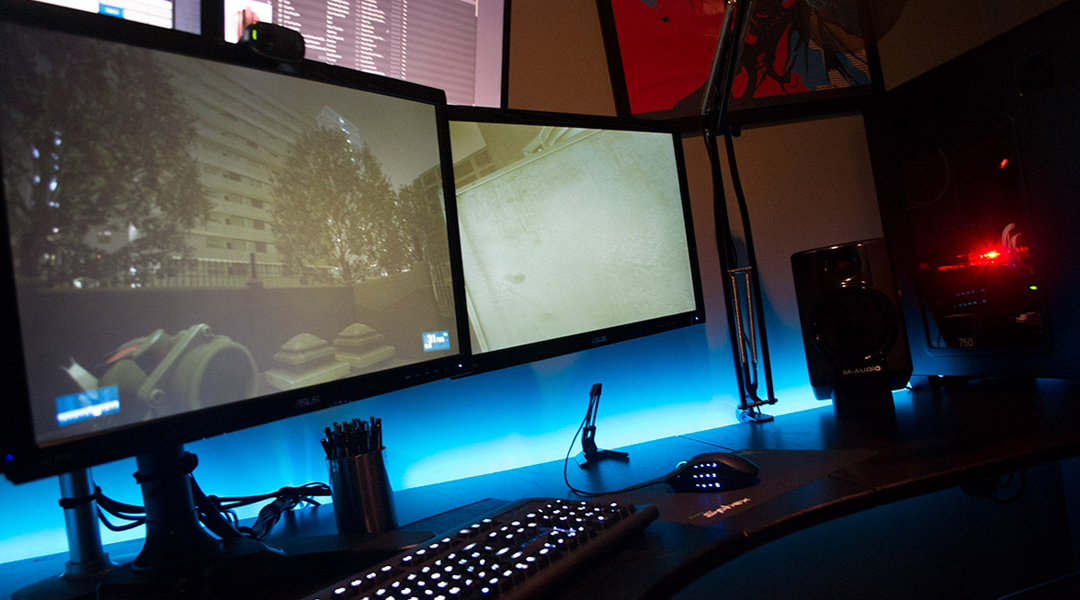
One of the most useful technological devices for home and business situations is the KVM switch. The name is technically “keyboard, video, and mouse switch.” KVM switches save time by allowing one to view multiple computers on one monitor by switching among them, instead of having to walk to a different monitor every time something needs to be done on another computer. KVM switches are typically used in businesses because some KVM switches can handle up to thirty-two computers. This makes KVM switches very helpful in cases of multiple servers, especially when several servers are on the same rack. Although all KVM switches do virtually the same thing, there are some differences.
 The most important difference that must be taken into account is the type of video signal to be used. KVM switches are primarily made with either DVI input and output or VGA input and output. Although VGA is the older, analog video signal; it is still the most commonly used. The video outputs of the single monitor and the computers or servers help determine what kind of KVM to use. If the monitor has only one video input (frequently VGA), then all the computers must have the same video output. KVM switches will not convert video signals. When the monitor has both DVI and VGA input, the video outputs on the computers will determine which KVM is best for the situation.
Another factor to look at on KVM switches are the connections needed for peripherals. The majority of older and still many current KVM switches use the PS/2 connections for the mouse and keyboard for each computer. Many newer KVM switches use USB ports instead of the PS/2 connections. This is primarily because the majority of newer computers support fully bootable USB devices, and most peripherals are USB.
KVM switches are also often connected with special cabling kits that usually bind the video and PS/2 or USB cables together. In some cases cat5 cables are used to connect computers to the KVM in conjunction with other cables depending on the specific KVM switch. Some KVM switches now include audio input and output jacks stepping up the experience to include audio with video. Usually at least some cables are included with a KVM switch when it is purchased. The cables usually included are those for peripheral devices and/or audio.
KVM switches are valuable tools. KVM switches are ideal for saving time and energy when large arrays of computers or servers are involved. They also provide a variety of connections to fit almost every situation. Using a KVM switch is one of the best ways to conserve resources and to get the job done just a bit easier.
by CDO Technolgy | Aug 12, 2014 | CDO Technology News, Maintenance, Monitors
Safely and Efficiently Cleaning LCD’s.
As the old CRT (cathode ray tube) monitors continue to rapidly exit the scene of everyday life, they are replaced by the sharp, high resolution LCD (liquid crystal display) monitors. Like all screens, LCD’s collect significant amounts of dust and smudges. The question that many encounter is, “How can I clean my LCD safely?”. It is important to clean an LCD monitor correctly to get the best experience from it.
The first step is to examine what not to use to clean an LCD. First, standard cleaning products that contain chemicals like ammonia or alcohol should be avoided. A common product people have used is Windex. These kinds of chemicals can damage an LCD by causing the coating on the LCD to degrade or come completely off. Regular tap water is also not advisable due to the chemicals and minerals it contains. It is also important to avoid spraying any product directly onto an LCD. LCD monitors are not water tight, and any liquid could seep in and damage the internal components of the monitor.
A second issue to address is what kind of cloth not to use when wiping the screen. Regular cleaning rags can be abrasive and have small bits of material that can scratch the screen. Any kind of paper products, like paper towel should not be used on an LCD due to their rough constitution. Although they may appear or feel soft, paper products can still damage the LCD’s surface.
What is the correct way? As far as cleaning solutions go, many office supply and computer stores sell special solutions specifically designed for LCD’s. Another common option is to make your own solution which normally consists of 50% distilled water and 50% vinegar. Distilled water can also be used by itself because it has been purged of minerals and chemicals. The best cloth to use is a microfiber cloth. Microfiber cloths are often sold with LCD monitors or with screen cleaner solutions. Another option is special, anti-static wipes designed particularly for cleaning an LCD, although these are less commonly sold.
Once the necessary items are assembled, the cleaning of the LCD can begin.
- First, turn off the LCD monitor. It is also recommended that the monitor be unplugged to reduce risk of electric shock.
- Second, it is suggested, though not necessary, to use some canned air to blow any loose dust of the surface of the LCD.
- Next, apply the cleaning solution to your microfiber cloth. Only get the cloth damp not soaked. Using a spray bottle to apply it can help accomplish this.
- Finally, gently wipe the LCD. To get the best results, wipe horizontally across the screen, while being sure to only press very gently. Allow the LCD to air dry afterward.
Following these guidelines can ensure you get the best visual experience from your LCD monitor. Cleaning your monitor properly and regularly can also improve its life span and overall performance.